# Rhino
# Quick Start Video
Prefer watching to reading? Who doesn't!
# Getting Started
💡 TIP
Check out our dedicated tutorial on how to get started with Rhino (opens new window)!
To install this Connector and add your Speckle account, follow the instructions in the Speckle Manager section. Speckle currently supports both Rhino 6 and Rhino 7.
Once installed, you can find the connector by running the Speckle command in Rhino. This should open a new pop-up window with the Desktop UI (the old version of Speckle used the SpecklePanel command for this).

# User Interface
This connector uses our shared Desktop UI. Read up on general guidelines for usage in the Desktop UI section.
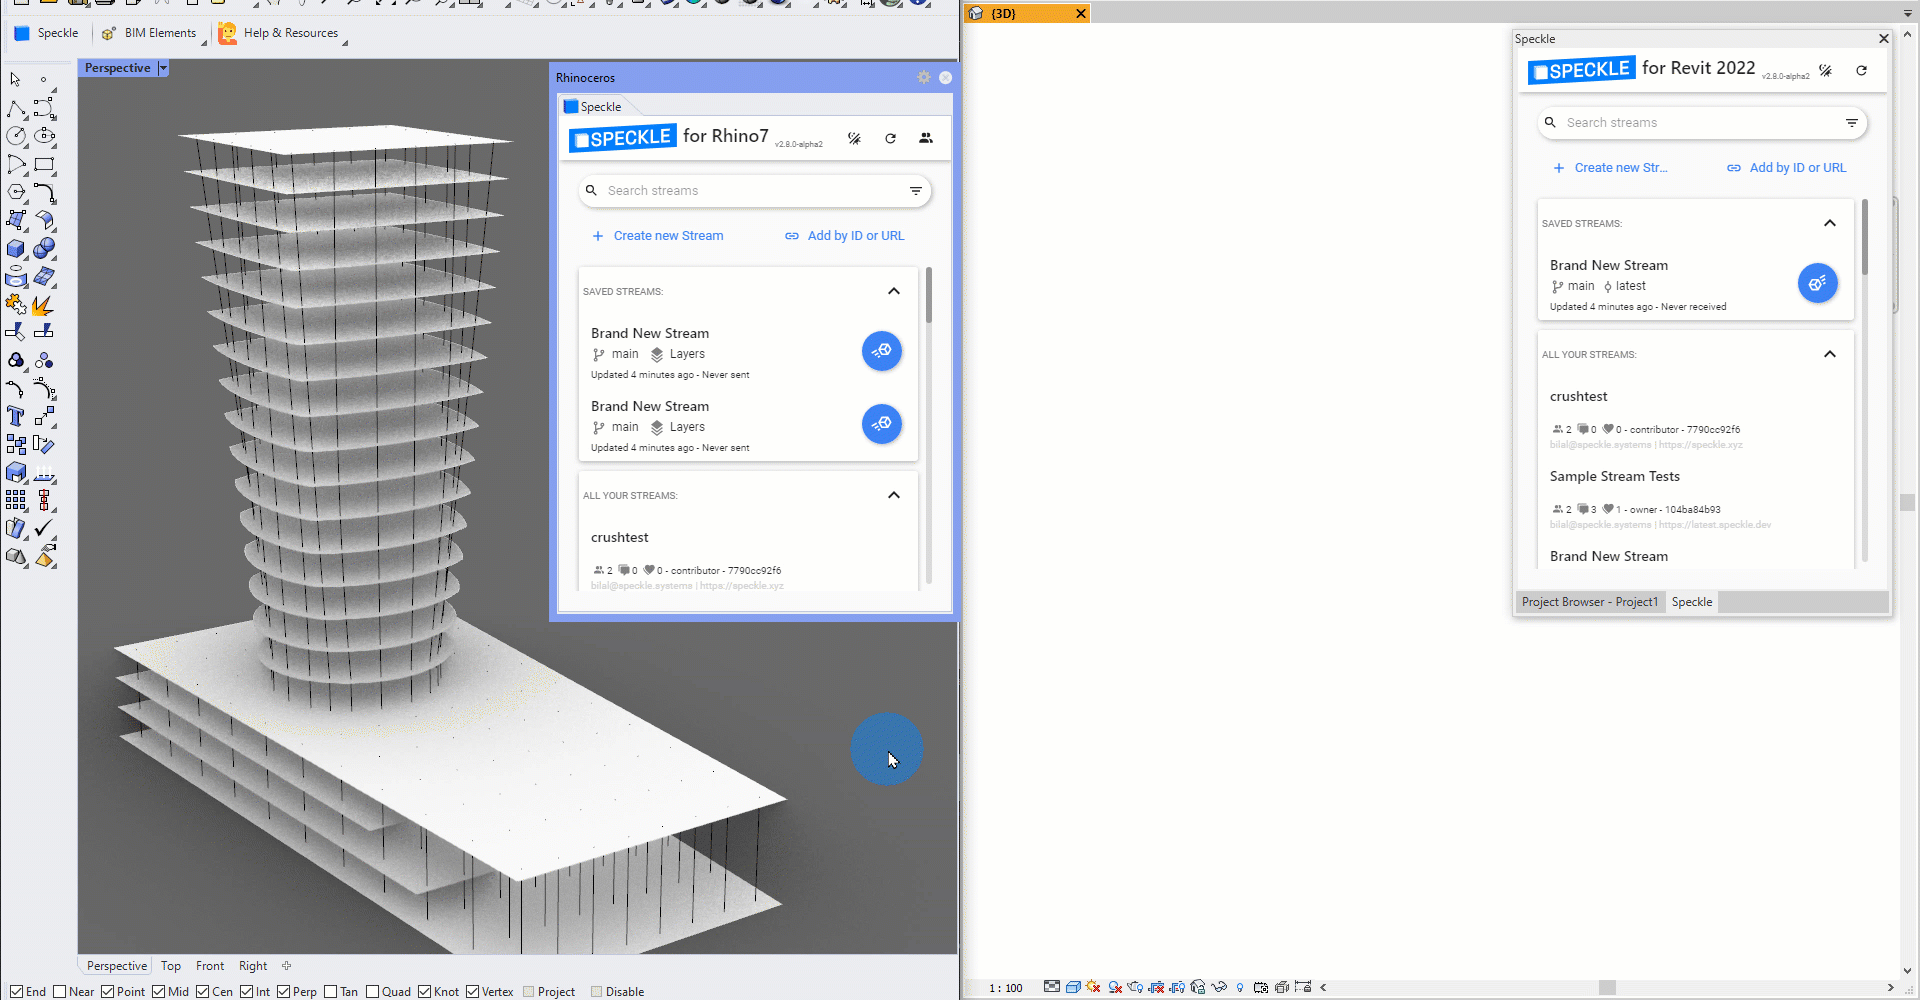
Once the Desktop UI panel is open, go ahead and create a new stream (or add an existing one) to the current file. Once the Rhino .3dm file is saved, the streams associated with that file will be saved too.
# Sending
Sending objects to Speckle can be done in multiple ways.
- Default method sends
Everythingfrom Rhino. This includes all document objects and project info.
Layersoption will send objects on the selected layers.
Project Informationadds the selected project information as views to the stream.
Selectionsends only the selected objects.
For the detail-lovers out there, you'll notice that your Rhino layer structure is replicated as Base object properties, which can be recreated on the receiving end.
# Receiving
In order to receive data from a Speckle stream, you'll first need to add that to your active document. If the stream already exists on the server it will automatically be listed. You can also use the search bar to find the stream you are looking for👀.

Once the stream has been added, switch to the Receive mode.

From here, you can select the branch and the commit you want to receive. Once you are done with the selection, go ahead and click on the 🔵 Receive button. This will display a progress bar (just like the sending operation) and, if successful, will add the received objects to the current document.

In order to prevent overriding existing layers/objects in the file, all received objects will be placed in a nested layer structure. This structure will contain all the layers. that the sent objects were placed to, with a parent layer with a name in the format <STREAM_NAME>: <BRANCH_NAME> @ <COMMIT>.
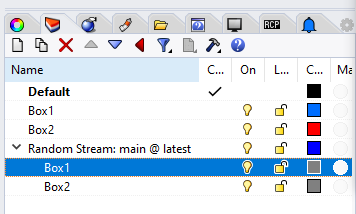
In the screenshot above, you can see the difference between:
- The original layers of the sent objects
- The layers created by Speckle when receiving the data back
You may also notice the overlapping received objects(gray) with the original objects (blue and red).

# Supported Elements
# Rhino BIM
Speckle 2.0 lets you tag Rhino geometry as Speckle BIM elements, so you can send objects like lines and surfaces as beams and floors! This means you can bring in your Rhino geometry directly as native Revit family elements 💥
# Features
Access Rhino BIM element creation through the Speckle BIM toolbar, which includes a button for every supported BIM element. Check the section below for a run through of which geometries can be tagged as Speckle BIM elements and their associated commands.

Rhino BIM manages BIM tags by assigning geometry objects a Attribute User Text property if they have been flagged as BIM elements while sending to a stream. Once they are added, remember to remove these tags with the Remove button if you wish to send the objects as plain geometry instead of BIM elements, or if you wish to assign them a different tag.
NOTE
If this is your first time installing the Speckle connector, you may need to load the toolbar by navigating to Options > Toolbars > SpeckleConnectorRhino, and then making sure the Speckle2 checkbox is selected.
Keep in mind that when streaming Speckle BIM elements from Rhino into Revit, they will come in as the first available family type in your Revit document. Currently there is no way to assign specific revit families to Rhino BIM elements, but this may be changed in the future.
# Using Rhino BIM
Assigning or removing Speckle BIM tags from geometry objects is easy:
- Click the BIM button corresponding to the BIM element or action you would like apply
- Select all geometry objects you wish to apply the button action to
- Press Enter
If you'd prefer to use the command line instead of the toolbar buttons, refer to each button section for their respective command. There's also a bit of magic happening behind the scenes to detect which types of geometry can be assigned Speckle BIM tags, so if a selected object is missing its Speckle BIM Attribute User Text property when you try to turn it into a BIM element, it probably doesn't qualify for that tag!
# Creating walls
Command: CreateWall
- Create or select vertically planar surfaces.

- Click on the Speckle BIM wall button and press Enter. Check your object's User Attribute Text to confirm the Speckle BIM tag was successfully applied.

- Send the geometry with Speckle: if you're unfamiliar with how to do this, check out the How To Get Started with Rhino docs!
- Receive the geometry in Revit: if you're unfamiliar with how to do this, check out the How To Get Started with Revit docs! The surface will be created as a default wall type.
- Transform your rhino surface, and resend it to Revit - your wall will automatically update!
# Creating Floors
Command: CreateFloor
- Create or select xy planar surfaces.

- Click on the Speckle BIM floor button and press Enter. Check your object's User Attribute Text to confirm the Speckle BIM tag was successfully applied.

- Send the geometry with Speckle: if you're unfamiliar with how to do this, check out the How To Get Started with Rhino docs!
- Receive the geometry in Revit: if you're unfamiliar with how to do this, check out the How To Get Started with Revit docs! The surface will be created as a default floor type.

- Transform your rhino surface, and resend it to Revit - your floor will automatically update!
# Creating Columns
Command: CreateColumn
- Create or select lines that are approximately vertical, defined as less than 45 degrees tilted relative to the z-axis.

- Click on the Speckle BIM Column button and press Enter. Check your object's User Attribute Text to confirm the Speckle BIM tag was successfully applied.

- Send the geometry with Speckle: if you're unfamiliar with how to do this, check out the How To Get Started with Rhino docs!
- Receive the geometry in Revit: if you're unfamiliar with how to do this, check out the How To Get Started with Revit docs! The line will be created as a default column type.

- Transform your rhino line, and resend it to Revit - your column will automatically update!
# Creating Beams
Command: CreateBeam
- Create or select lines that are approximately horizontal, defined as less than 45 degrees tilted relative to the xy-plane.

- Click on the Speckle BIM Beam button and press Enter. Check your object's User Attribute Text to confirm the Speckle BIM tag was successfully applied.

- Send the geometry with Speckle: if you're unfamiliar with how to do this, check out the How To Get Started with Rhino docs!
- Receive the geometry in Revit: if you're unfamiliar with how to do this, check out the How To Get Started with Revit docs! The line will be created as a default beam type.
- Transform your rhino line, and resend it to Revit - your beam will automatically update!
# Creating Pipes
Command: CreatePipe
- Create or select open curves (this works best for lines).
- Click on the Speckle BIM Pipe button and press Enter. Check your object's User Attribute Text to confirm the Speckle BIM tag was successfully applied. Note: the default Pipe
diameteris set to "1.0" - if you'd like to change this, just change the value in the user string! - Send the geometry with Speckle: if you're unfamiliar with how to do this, check out the How To Get Started with Rhino docs.
- Receive the geometry in Revit: if you're unfamiliar with how to do this, check out the How To Get Started with Revit docs. The curve will be created as a default pipe type.
- Transform your rhino curve, and resend it to Revit - your pipe will automatically update!
# Creating Ducts
Command: CreateDuct
- Create or select open curves (this works best for lines).
- Click on the Speckle BIM Duct button and press Enter. Check your object's User Attribute Text to confirm the Speckle BIM tag was successfully applied. Note: the default Duct
width,height, anddiameteris set to "1.0" - if you'd like to change this, just change the corresponding value in the user string. - Send the geometry with Speckle: if you're unfamiliar with how to do this, check out the How To Get Started with Rhino docs.
- Receive the geometry in Revit: if you're unfamiliar with how to do this, check out the How To Get Started with Revit docs. The curve will be created as a default duct type.
- Transform your rhino curve, and resend it to Revit - your duct will automatically update!
# Creating Topography
Command: CreateTopography
- Create or select open meshes.
- Click on the Speckle BIM Topography button and press Enter. Check your object's User Attribute Text to confirm the Speckle BIM tag was successfully applied.
- Send the geometry with Speckle: if you're unfamiliar with how to do this, check out the How To Get Started with Rhino docs.
- Receive the geometry in Revit: if you're unfamiliar with how to do this, check out the How To Get Started with Revit docs. The mesh will be created as a default topography type.
- Transform your rhino mesh, and resend it to Revit - your topography will automatically update!
# Creating Face Walls
Command: CreateFaceWall
- Create or select any kind of surface.

- Click on the Speckle BIM face wall button and press Enter. Check your object's User Attribute Text to confirm the Speckle BIM tag was successfully applied.

- Send the geometry with Speckle: if you're unfamiliar with how to do this, check out the How To Get Started with Rhino docs!
- Receive the geometry in Revit: if you're unfamiliar with how to do this, check out the How To Get Started with Revit docs! The surface will be created as a default wall type.

- Transform your rhino surface, and resend it to Revit - your face wall will automatically update!
# Creating Direct Shapes
Command: CreateDirectShape
- Create or select any kind of brep, extrusion, or mesh.

- Click on the Speckle BIM direct shape button and press Enter. Select the BIM type for this direct shape in the commandline. Check your object's User Attribute Text to confirm the Speckle BIM tag was successfully applied.

- Send the geometry with Speckle: if you're unfamiliar with how to do this, check out the How To Get Started with Rhino docs!
- Receive the geometry in Revit: if you're unfamiliar with how to do this, check out the How To Get Started with Revit docs! The geometry will be created as a generic model.

- Transform your rhino geometry, and resend it to Revit - your generic model will automatically update!
# Creating Adaptive Components
Command: CreateAdaptiveComponent
- Create a set of points that define your adaptive components. In this example, our Revit adaptive family is defined by four points, so we will have a collection of points in a multiple of four.

- Click on the Speckle BIM adaptive component button and press Enter. Then type the family name for your adaptive component in commandline. Select your points in order, pressing enter after every group of four. Press Enter again when done, and blocks will be created for each point group. Check your block's User Attribute Text to confirm the Speckle BIM tag was successfully applied!

- Send the blocks with Speckle: if you're unfamiliar with how to do this, check out the How To Get Started with Rhino docs!
- Receive the blocks in Revit: if you're unfamiliar with how to do this, check out the How To Get Started with Revit docs! Make sure you have your Adaptive Family loaded into your Revit document. The geometry will be created as instances of your adaptive component!

# Automatically Creating BIM elements
Command: CreateAutomatic
This is a super magic option that will try to automatically assign the most appropriate Speckle BIM tags to all of your selected geometry 🔮
- Select all geometry that you want to turn into BIM elements.
- Click on the Speckle BIM automatic button and press enter. Check each geometry's User Attribute Text to see the Speckle BIM tag that is applied.

- Send the geometry with Speckle: if you're unfamiliar with how to do this, check out the How To Get Started with Rhino docs!
- Receive the geometry in Revit: if you're unfamiliar with how to do this, check out the How To Get Started with Revit docs! The geometries that have a BIM tag will come in as their respective default category type.

# Remove
Command: RemoveSpeckleSchema
Removes all Speckle BIM tags from selected geometry objects. This is necessary when you want to send your geometry as regular geometry, or if you'd like to change the BIM tag for an object.
- Select all geometry that you want to remove Speckle BIM tags for.
- Click on the Speckle BIM remove button and press enter. If you check your geometry's User Attribute Text, you should no longer see the SpeckleSchema tag!
# Schema Builder (OLD)
This feature is now replaced by Rhino BIM, but the commands still work - check below for a walkthrough of old schema builder features.
Currently, direct conversions are available for the following types:
| Base Geometry | BuiltElement schemas | Revit type |
|---|---|---|
| Planar surface | Wall Floor Roof | |
| Planar polysurface | Wall | |
| Planar and nurbs surface | FaceWall | ✅ |
| Line | Column Beam | |
| Brep / extrusion | DirectShape | ✅ |
| Mesh | DirectShape | ✅ |
# Walkthrough
Stream your Rhino objects directly into Revit as BuiltElements! Rhino to Revit interop uses a custom Speckle Attribute User Text (AUT) string to determine an object's schema before sending streams. AUTs are modified with two commands:
ApplySpeckleSchemagives you options for adding AUTs to model objectsRemoveSpeckleSchemaremoves schema AUTs from model objects
Some schemas have additional parameters that can be manually modified for custom control over parameters like Revit Family or Revit Type.
# Assigning schemas

# The automagic method
The easiest way to assign schemas to your Rhino objects is to let the Speckle schema builder decide for you!
- Type
ApplySpeckleSchemain the command line - Select objects for BuiltElements conversion
- By default,
Automaticis set toOn. Press Enter!
The algorithm for automatic schema application takes into account object and layer naming before it tries to find the best BuiltElements schema to apply. For example, if an object has Wall in its name, or in the absence of a name, the object is nested in a layer with a name that includes Wall, then the automatic method will try to send the object as a Speckle Wall element. If the algorithm can't find a BuiltElements type in either the object or layer name, it will analyze the object geometry and try to find the first schema fit based on the object's properties.
note DirectShape conversions are not assigned during the automagic method. If an XY planar surface does not have a specific schema in its object or layer name, it will default to Floor, instead of Roof or Ceiling.
# The single schema method
You can assign a specific schema to selected objects through the single schema method: this method also includes conversions to DirectShape and FaceWall schemas.
- Type
ApplySpeckleSchemain the command line - Set
AutomatictoOff - Select a
Schemaoption - By default,
DirectShapeis set toOff. To send as a DirectShape instead of a native object, set the toggle toOn. - Select objects for schema application, and press Enter!
# Customizing properties
Revit-specific BuiltElements schemas such as FaceWall and DirectShape can be manually customized with additional properties. By default, these schemas will have a user string with the following formats:
FaceWall([family], [type])
DirectShape(Schema, UniqueName)
2
To assign custom values, select your FaceWall or DirectShape object and navigate to its User Attribute Text panel. Double click on the SpeckleSchema entry value and replace the [] properties with custom values if you want to assign a specific Revit family or type to your FaceWall object. If no changes are made, FaceWalls are assigned to the Basic Wall type by default. For DirectShapes, a unique shape name is automatically generated, but can be changed to a custom string if desired.
# Removing schemas
Removing schemas from Rhino objects is super easy:
- Type
RemoveSpeckleSchemain the command line - Select objects to remove schemas from
- Press Enter - Speckle AUT strings are now deleted from all selected objects!
# Things to keep in mind
This section is work in progress 🚧 ! Please check back again soon 😃